Module 2: Infrastructure Setup
Deploy Azure infrastructure using Azure Developer CLI (azd)
Module 2: Infrastructure Setup
Duration: 45 minutes
Objective: Deploy all required Azure infrastructure with a single command using Azure Developer CLI (azd).
🎯 Learning Objectives
By the end of this module, you will:
- Understand what Azure Developer CLI (azd) is and why it’s used
- Deploy Azure infrastructure from templates using
azd up - Configure Azure Container Apps environment
- Set up Azure Storage Account for analytics data
- Verify successful resource deployment
� Prerequisites Check
Before starting this module, ensure you completed Module 1:
- ✅ Repository cloned or downloaded
- ✅ Azure CLI installed and logged in- ✅ Docker Desktop installed and running- ✅ Azure AI Foundry project created with GPT model deployed
- ✅ Foundry endpoint URL and model deployment name ready
Quick verification:
# Verify Azure CLI login
az account show

# Verify you're in the correct directory
cd C:\[your-install-directory]\Cora-Voice-Agent-Training

# Or if you cloned elsewhere, navigate to where you cloned the repo
🚀 What is Azure Developer CLI (azd)?
Azure Developer CLI (azd) is a command-line tool that makes deploying applications to Azure ridiculously easy.
The Old Way vs The azd Way
❌ The Manual Approach (3-4 hours):
- Log into Azure Portal
- Click “Create Resource” → Container App
- Fill out 47 fields, hope you don’t miss one
- Click “Create Resource” → Storage Account
- Configure storage, permissions, networking
- Click “Create Resource” → Container Registry
- Build Docker image locally
- Push to registry with correct tags
- Configure environment variables (one at a time)
- Set up managed identities
- Assign RBAC roles
- Configure logging
- Debug why something doesn’t work
- Realize you put resources in different regions
- Start over 😭
✅ The azd Approach (5-10 minutes):
azd up
That’s it. Seriously.
What Does azd up Actually Do?
When you run azd up, it orchestrates:
- 📦 Package: Builds your Docker container
- 🏗️ Provision: Creates Azure resources from Bicep templates
- 🚀 Deploy: Pushes your container and deploys the app
- 🔗 Configure: Sets up environment variables, managed identities, RBAC
All in one command.
azd vs Azure CLI: What’s the Difference?
| Feature | Azure CLI (az) |
Azure Developer CLI (azd) |
|---|---|---|
| Purpose | Manage individual Azure resources | Deploy complete applications |
| Scope | Resource-level operations | Full application lifecycle |
| Configuration | Manual commands | Template-driven (Bicep/Terraform) |
| Use Case | “Create a storage account” | “Deploy my entire app to Azure” |
| Learning Curve | Need to know every resource type | Know your app, templates handle resources |
Think of it this way:
az= Buying individual ingredients and cooking from scratchazd= Using a meal kit with pre-measured ingredients and recipe
Both are great! But for deploying apps, azd saves massive time.
🏗️ What Will Be Deployed?
Running azd up will create these Azure resources in your subscription:
Core Application Infrastructure
| Resource | Purpose | Estimated Cost |
|---|---|---|
| Container Apps Environment | Hosts your containerized application | ~$0/month (consumption-based) |
| Container App | Runs the Flask web application | ~$0-5/month (scale to zero) |
| Container Registry | Stores Docker images | ~$5/month (Basic tier) |
| Storage Account | Stores conversation scores (Table Storage) | ~$1/month |
Monitoring & Operations
| Resource | Purpose | Estimated Cost |
|---|---|---|
| Log Analytics Workspace | Centralized logging | ~$0-5/month (depends on ingestion) |
| Application Insights | Application performance monitoring | Included with Log Analytics |
Security & Identity
| Resource | Purpose | Cost |
|---|---|---|
| Managed Identity | Secure authentication (no API keys!) | Free |
| RBAC Role Assignments | Grants permissions to managed identity | Free |
💰 Total Estimated Cost: ~$10-20/month
💡 Cost Optimization Tip: Container Apps scale to zero when idle. During development, your app will cost almost nothing when you’re not using it!
📝 Step 1: Install Azure Developer CLI
Check if azd is Already Installed
azd version
If you see a version number (e.g., azd version 1.5.0), you’re good! Skip to Step 2.
Install azd (Windows)
Option A: Using winget (Recommended)
winget install microsoft.azd
Option B: Using PowerShell Script
powershell -ex AllSigned -c "Invoke-RestMethod 'https://aka.ms/install-azd.ps1' | Invoke-Expression"
Install azd (macOS)
brew tap azure/azd && brew install azd
Install azd (Linux)
curl -fsSL https://aka.ms/install-azd.sh | bash
Verify Installation:
azd version
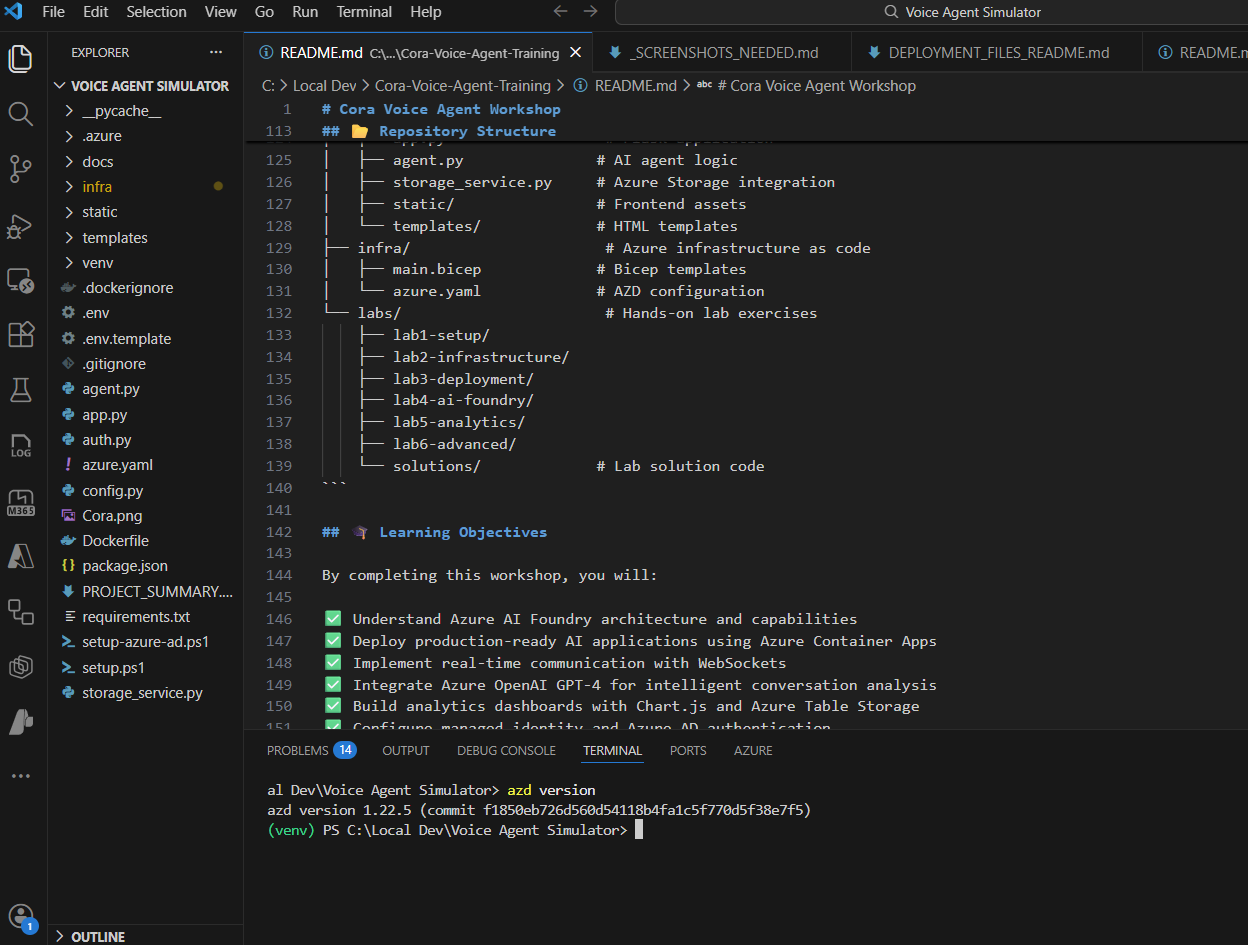
Click to enlarge
⚙️ Step 2: Initialize azd Environment
Navigate to your project directory:
cd C:\[your-install-directory]\Cora-Voice-Agent-Training
Initialize azd (this creates a local environment configuration):
azd init
📝 Note: If you already have a .env file from Module 1, azd init may detect and use those values automatically, reducing the number of prompts you see. This is expected behavior!
You’ll be prompted for:
1. Environment Name
Enter a new environment name: cora-dev
What is this? A label for this deployment (e.g., dev, test, prod). This keeps multiple deployments separate.
Recommendation: Use cora-dev for this training. Or if you used dev in your Module 1 .env file, use dev here to keep them aligned.
2. Subscription Selection
Select an Azure Subscription to use:
  1. My Azure Subscription (12345678-1234-1234-1234-123456789012)
> 2. Another Subscription (87654321-4321-4321-4321-210987654321)
Choose the subscription where you want to deploy CORA.
3. Location Selection
Select an Azure location to use:
  1. (US) East US
> 2. (US) East US 2
  3. (Europe) West Europe
Recommendation: Choose East US or East US 2 for best Azure OpenAI availability.
💡 Pro Tip: Azure AI Foundry and Container Apps must be in regions that support both services. East US/East US 2 are safe bets!
✅ Verify Your azd Configuration
After azd init, verify your environment was created:
azd env list
You should see your environment name (e.g., cora-dev) listed as the default.
🔐 Step 3: Configure Environment Variables
Remember the .env file you created in Module 1? We’ll use it now! azd needs to know about your Azure AI Foundry endpoint and model.
If you didn’t create a .env file yet, copy the example:
# Windows
copy .env.example .env

# Mac/Linux
cp .env.example .env
Verify your .env file has these values filled in:
# From Module 1 - these should already be filled in
AZURE_AI_FOUNDRY_ENDPOINT=https://your-foundry-project.openai.azure.com/
AZURE_AI_MODEL_NAME=gpt-4o
Now set these values for azd using the values from your .env file:
# CRITICAL: These parameters are passed to Bicep during deployment
azd env set azureOpenAIEndpoint "https://your-foundry-project.openai.azure.com/"
azd env set modelName "gpt-4o"
Replace:
https://your-foundry-project.openai.azure.com/with the value fromAZURE_AI_FOUNDRY_ENDPOINTin your .env filegpt-4owith the value fromAZURE_AI_MODEL_NAMEin your .env file
⚠️ IMPORTANT: The parameter names must match exactly:
- Use
azureOpenAIEndpoint(NOTAZURE_OPENAI_ENDPOINT) - Use
modelName(NOTAZURE_AI_MODEL_NAME)
These names match the Bicep template parameters and will be injected into your Container App during deployment.
💡 Verify your settings:
azd env get-values
You should see your endpoint and model name listed.
🔒 Security Note: These values are stored in azd’s environment configuration (.azure/[env-name]/.env) and will be passed as parameters to the Bicep deployment.
📋 Step 3.5: Register Azure Resource Providers
CRITICAL STEP: Before running azd up, you must register the required Azure resource providers in your subscription.
Why Do I Need This?
Azure subscriptions don’t automatically have all resource types enabled. Container Apps and related services require specific providers to be registered.
Register the Required Providers
Run these commands:
az provider register --namespace Microsoft.App
az provider register --namespace Microsoft.ContainerService
Wait for Registration to Complete
Registration takes 2-5 minutes. Check the status:
az provider show --namespace Microsoft.App --query "registrationState"
az provider show --namespace Microsoft.ContainerService --query "registrationState"
Wait until BOTH show “Registered” before proceeding!
You’ll see:
"Registered"
⚠️ If you skip this step: Your azd provision will fail with error SubscriptionIsNotRegistered.
� Before You Deploy: Docker Desktop Required
IMPORTANT: azd up builds a Docker container image locally before pushing to Azure. You need Docker Desktop installed and running.
Install Docker Desktop (if not already installed)
Windows:
- Download: Docker Desktop for Windows
- Requires: Windows 10/11 64-bit with WSL 2
- After install: Launch Docker Desktop and wait for it to start
Mac:
- Download: Docker Desktop for Mac
- Supports: Apple Silicon (M1/M2) and Intel chips
- After install: Launch Docker Desktop from Applications
Linux:
- Install: Docker Engine for Linux
- No Desktop version needed - just Docker Engine
Verify Docker is Running
docker --version
You should see output like: Docker version 24.0.x
💡 Pro Tip: Make sure Docker Desktop shows “Engine running” in the bottom-left corner before proceeding!
�🚀 Step 4: Deploy Everything with azd up
This is the moment you’ve been waiting for. One command deploys everything:
azd up
What Happens During azd up?
You’ll see output like this (this takes 5-10 minutes):
Provisioning Azure resources (azd provision)
Provisioning Azure resources can take some time

Subscription: My Azure Subscription (12345678-abcd-1234-abcd-123456789012)
Location: East US

  You can view detailed progress in the Azure Portal:
  https://portal.azure.com/#view/HubsExtension/DeploymentDetailsBlade/...

  (✓) Done: Resource group: rg-cora-dev
  (✓) Done: Log Analytics workspace: log-cora-dev
  (✓) Done: Container Registry: crcora123456
  (✓) Done: Storage Account: stcoradev123456
  (✓) Done: Container Apps Environment: cae-cora-dev
  (✓) Done: Container App: ca-cora-dev

SUCCESS: Your infrastructure has been provisioned!

Packaging services (azd package)
Building Docker image for service 'web'...
  => [internal] load build definition from Dockerfile
  => => transferring dockerfile: 1.2kB
  => [1/6] FROM docker.io/library/python:3.11-slim
  => [2/6] WORKDIR /app
  => [3/6] COPY requirements.txt .
  => [4/6] RUN pip install --no-cache-dir -r requirements.txt
  => [5/6] COPY . .
  => [6/6] RUN pip install --no-cache-dir -e .
  => exporting to image

SUCCESS: Services packaged!

Deploying services (azd deploy)
Pushing Docker image to Azure Container Registry...
Deploying to Container App...

  (✓) Done: Deploying service 'web'

SUCCESS: Your application has been deployed!

Endpoint: https://ca-cora-dev.happyocean-a1b2c3d4.eastus.azurecontainerapps.io

You can now access your application at the URL above!
🎉 That’s it! Your app is deployed to Azure!
Understanding the Output
| Phase | What Happened |
|---|---|
| Provisioning | Created all Azure resources from infra/main.bicep |
| Packaging | Built Docker container from src/Dockerfile |
| Deploying | Pushed container to registry and deployed to Container App |
✅ Step 5: Verify Deployment
1. Check Deployment Status
azd show
This displays all deployed resources and their endpoints.
2. Open Your Application
Copy the endpoint URL from the azd up output (it looks like):
https://ca-cora-dev.happyocean-a1b2c3d4.eastus.azurecontainerapps.io
Open it in your browser. You should see the CORA landing page!
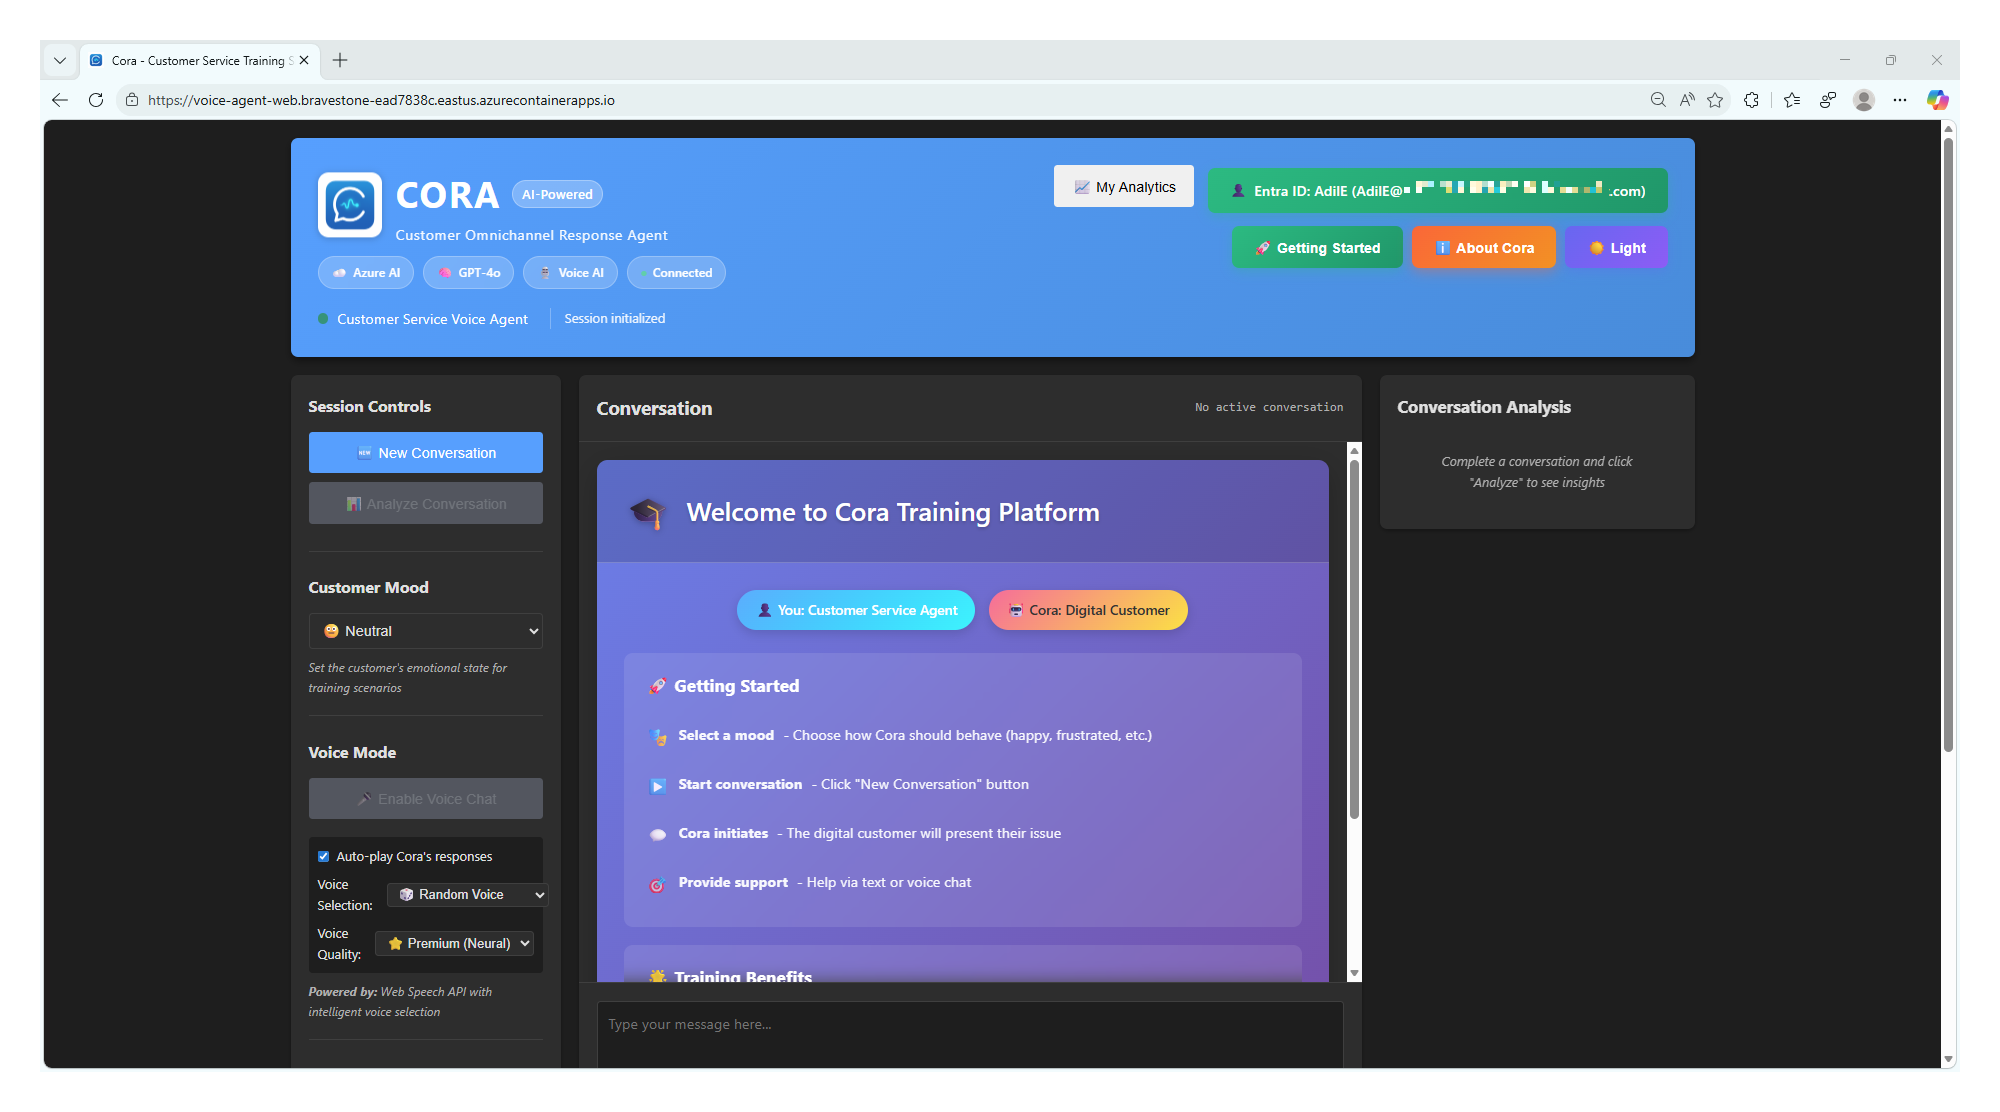
Click to enlarge
3. Verify Resources in Azure Portal
azd show --output json
Or visit the Azure Portal:
- Go to portal.azure.com
- Search for your resource group (e.g.,
rg-cora-dev) - Confirm all resources are created
Expected resources:
- ✅ Container App (
ca-cora-dev) - ✅ Container Apps Environment (
cae-cora-dev) - ✅ Container Registry (
crcora...) - ✅ Storage Account (
stcora...) - ✅ Log Analytics Workspace (
log-cora-dev)
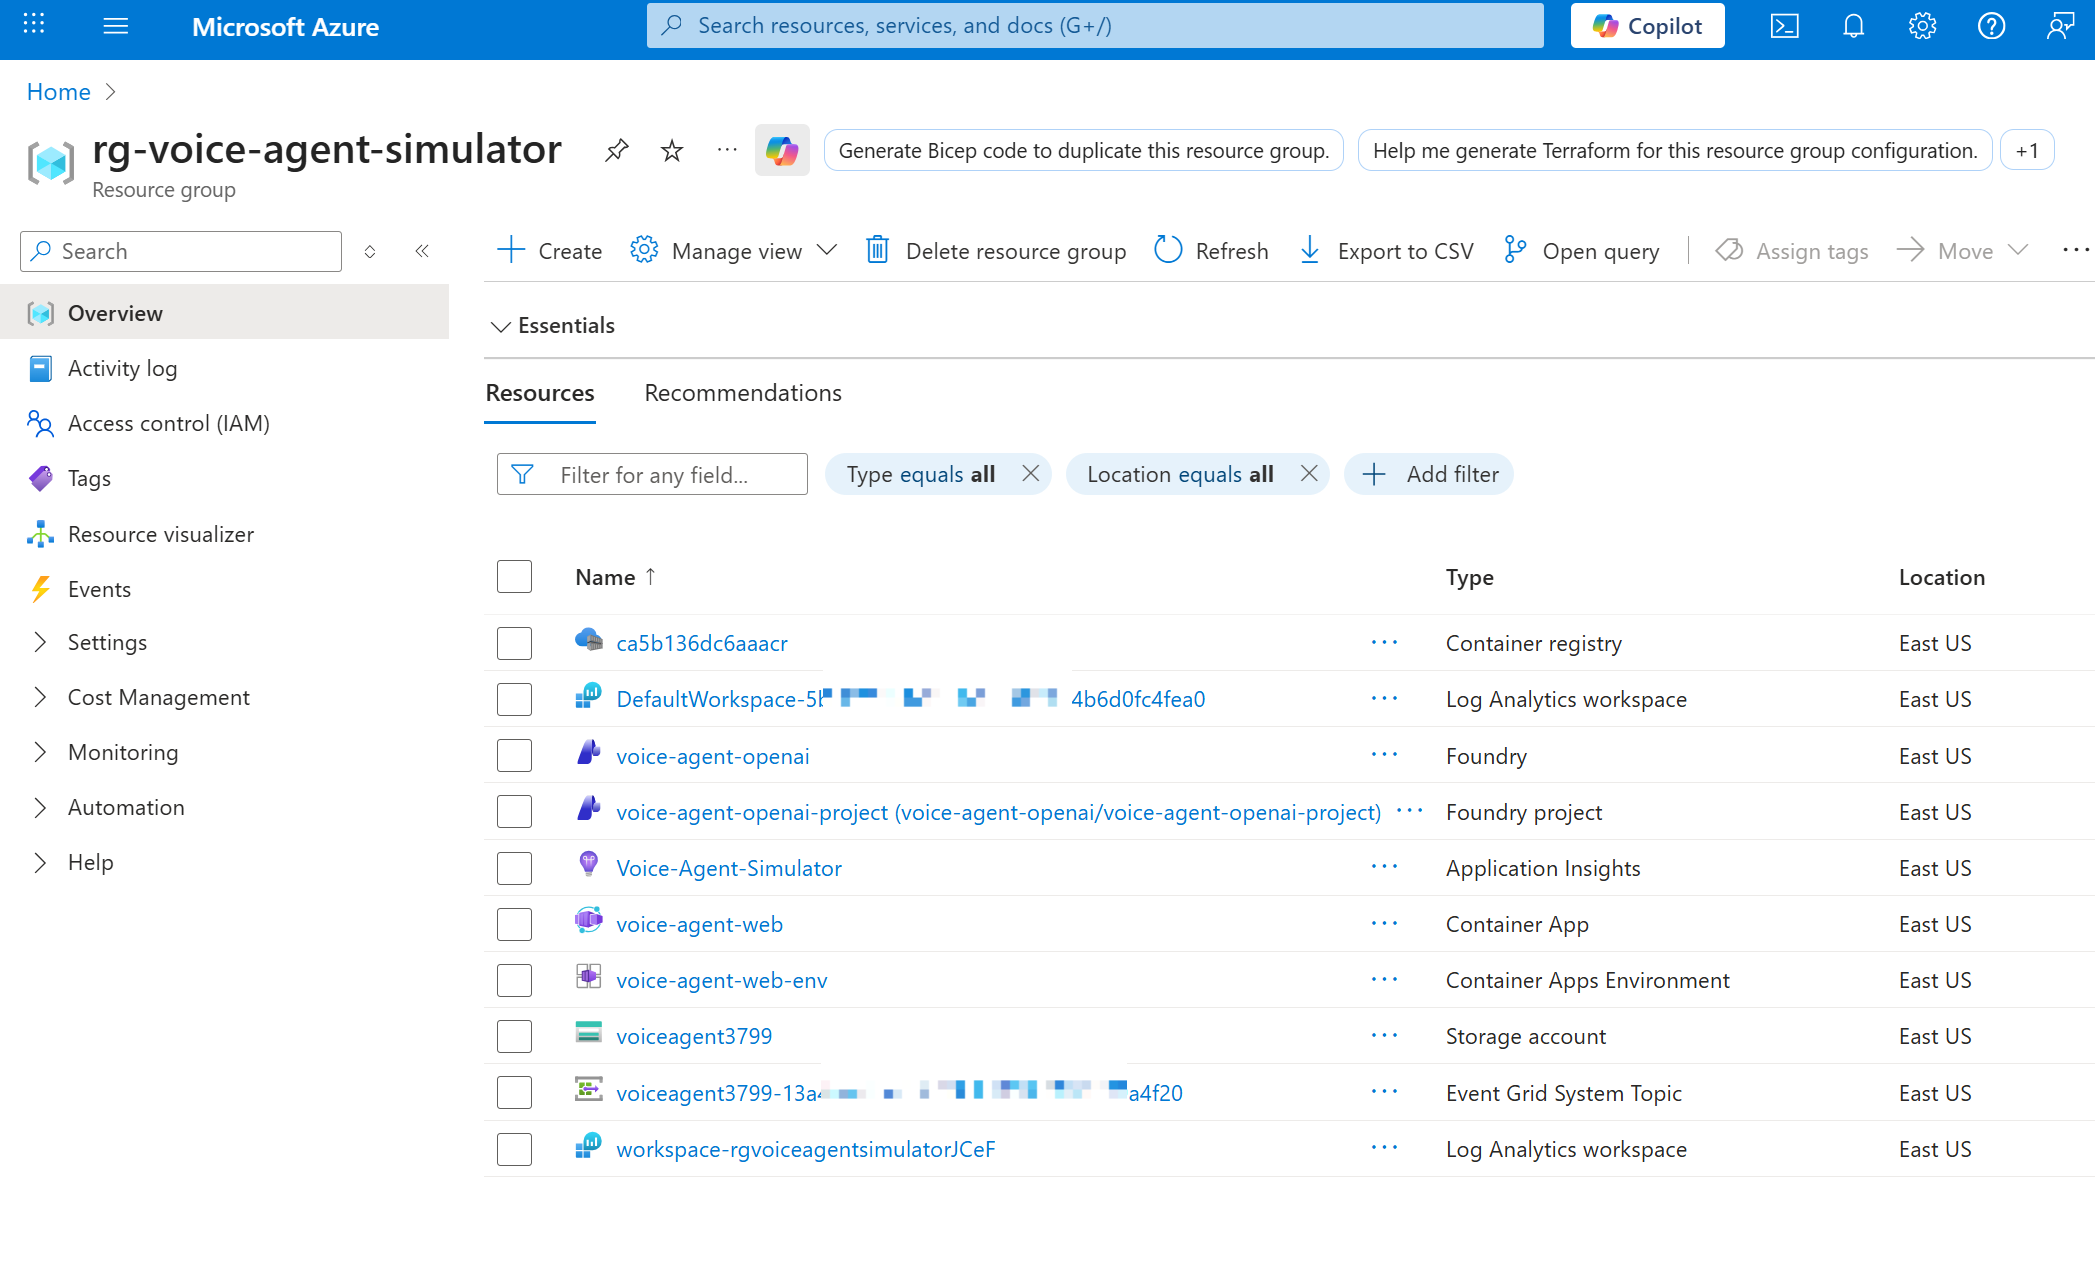
Click to enlarge
🐛 Troubleshooting Common Issues
Issue 1: “SubscriptionIsNotRegistered” Error
Error message:
SubscriptionIsNotRegistered: Subscription 'xxxxx' is not registered
with the required resource providers Microsoft.App and Microsoft.ContainerService
Solution: You skipped Step 3.5! Register the providers:
az provider register --namespace Microsoft.App
az provider register --namespace Microsoft.ContainerService
Wait 2-5 minutes, then verify:
az provider show --namespace Microsoft.App --query "registrationState"
Once both show “Registered”, retry:
azd provision --no-prompt
Issue 2: azd up Fails with “Subscription not found”
Solution: Make sure you’re logged in to Azure CLI:
az login
az account set --subscription "Your Subscription Name"
Then retry azd up.
Issue 3: “Location does not support Container Apps”
Solution: Choose a different region during azd init:
azd env set AZURE_LOCATION eastus
azd provision
Supported regions: East US, East US 2, West US 2, North Europe, West Europe
Issue 4: “Failed to build Docker image”
Solution: Ensure Docker Desktop is running (if on Windows/Mac):
# Check Docker status
docker --version
docker ps
If Docker isn’t running, start Docker Desktop and retry.
Issue 5: Container App Deployed but Returns 502/503
Likely cause: Environment variables not set correctly.
Solution: Check Container App environment variables:
az containerapp show --name ca-cora-dev --resource-group rg-cora-dev --query "properties.template.containers[0].env"
Verify these are set:
AZURE_OPENAI_ENDPOINTAZURE_OPENAI_DEPLOYMENT_NAMEAZURE_OPENAI_API_VERSION
To fix, update via azd:
azd env set AZURE_OPENAI_ENDPOINT "https://your-endpoint.com"
azd deploy
Issue 5: “Cannot access storage account”
Likely cause: Managed identity permissions not yet propagated.
Solution: Wait 2-3 minutes for Azure AD role assignments to propagate, then refresh the app.
🏗️ Understanding What Was Deployed
Let’s peek under the hood at what azd created for you.
The azure.yaml File
Open azure.yaml in the repository root:
name: cora-voice-agent
metadata:
  template: cora-voice-agent@0.0.1-beta
services:
  web:
    project: ./src
    language: python
    host: containerapp
What does this tell azd?
- name: Project identifier
- services.web.project: Where the application code lives (
./src) - services.web.language: Python app (azd knows to look for
requirements.txt) - services.web.host: Deploy to Azure Container Apps
The Bicep Templates (infra/ folder)
The infra/ directory contains Infrastructure as Code templates:
infra/
├── main.bicep                       # Main template
├── main.parameters.json             # Parameter values
├── abbreviations.json               # Resource naming conventions
└── core/
    ├── host/
    │   ├── container-app.bicep            # Container App definition
    │   ├── container-apps-environment.bicep  # Container environment
    │   └── container-registry.bicep       # Container registry
    └── monitor/
        └── monitoring.bicep               # Log Analytics & App Insights
Key concepts:
- main.bicep: Orchestrates all resources
- Modules: Reusable templates for specific resources
- Parameters: Values you can customize per environment
📚 Want to learn more? Check out infra/README.md for a deep dive into the Bicep templates.
🎨 Customization Options
Change Resource Names
By default, azd generates names like ca-cora-dev. To customize:
azd env set RESOURCE_NAME_PREFIX mycompany
azd provision
Deploy to a Different Environment
Want separate dev/test/prod environments?
# Create new environment
azd init --environment cora-prod

# Deploy to prod
azd up
Each environment is isolated with its own Azure resources.
Scale Up Container App
By default, Container Apps scale 0-10 replicas. To change:
Edit infra/core/host/container-app.bicep:
scale: {
  minReplicas: 1
  maxReplicas: 20  // Increased from 10
}
Then redeploy:
azd provision
💾 Step 6: Save Your Deployment Info
After successful deployment, save these for future reference:
# Get all outputs
azd show --output json > deployment-info.json
Key information to note:
- Container App URL: Your application endpoint
- Resource Group Name: Where all resources live
- Storage Account Name: For accessing analytics data
- Container Registry Name: For pushing updated images
✅ Module 2 Checklist
Before moving to Module 3, verify:
- ✅ Azure Developer CLI installed (
azd versionworks) - ✅ azd initialized (
azd initcompleted successfully) - ✅ Environment variables configured (Foundry endpoint, model name)
- ✅ Deployment completed successfully (
azd upfinished without errors) - ✅ Application accessible in browser (URL returns CORA landing page)
- ✅ All Azure resources visible in Portal (6 resources in resource group)
📊 Knowledge Check
Test your understanding before moving forward:
- What does
azd updo?Click to reveal answer
Provisions Azure infrastructure, builds Docker container, and deploys the application - all in one command. - What’s the difference between
azdandazCLI?Click to reveal answer
`azd` is for deploying complete applications with templates. `az` is for managing individual Azure resources. - Why does Container Apps cost ~$0 when idle?
Click to reveal answer
Container Apps can scale to zero replicas when not in use. You only pay for compute when the app is actively handling requests. - Where are the infrastructure templates defined?
Click to reveal answer
In the `infra/` directory, using Bicep templates (main.bicep and core modules). - How do you deploy updates after changing code?
Click to reveal answer
Run `azd deploy` to rebuild and redeploy just the application (skips infrastructure provisioning).
🎉 Congratulations!
You’ve successfully deployed CORA to Azure using Infrastructure as Code! 🚀
What you accomplished:
- ✅ Deployed a production-ready application to Azure
- ✅ Created 6+ Azure resources with one command
- ✅ Configured secure authentication with Managed Identity
- ✅ Set up monitoring and logging automatically
Next up: Module 3 will walk you through testing the application, understanding the architecture, and exploring how the components interact.
4. Verification & Troubleshooting
- Checking resource group in Azure Portal
- Verifying Container Apps environment
- Common deployment issues
🔗 Resources
📝 Lab Exercise
Coming Soon: Hands-on deployment with azd
Estimated Time: 30 minutes